
Bespoke shelving unit
- Dominika
- Aug 18, 2019
- 7 min read
Hey there!
Finally I got to complete my first proper "little" project from the scratch, that I designed specifically for someone very special to me. I am very pleased with the end result and I got rewarded with the best possible payback - sincere smile and hug!! Couldn't have asked for a better feedback :)
Anyways, ideally I should start this post with the design concept.
Primary purpose of this bespoke item is to store and display diverse botanic selection.
So, to come up with the best design, I sat down at my "designing board" and started throwing some ideas and working through them.
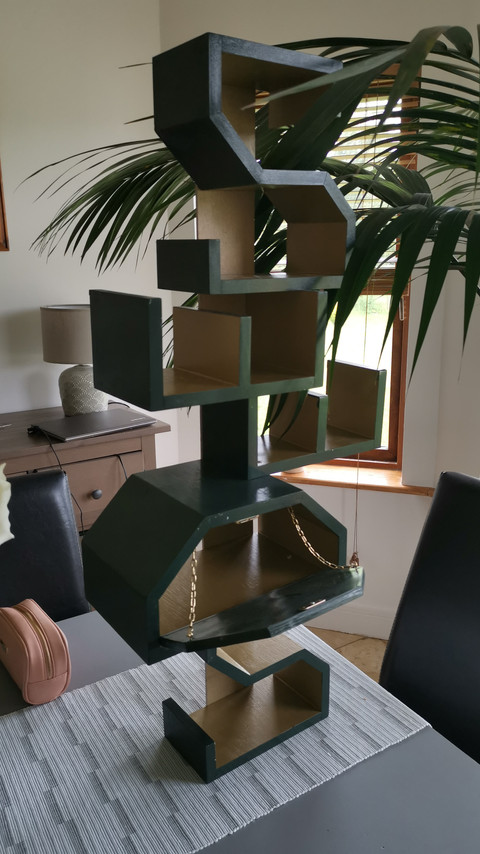
Eventually, I ended up with a sketch of a vertical shelving unit, composed of stacked letters forming word SEEDS.
Satisfied with my initial concept, I modeled up a 3D version of the unit and I was able to produce plan and elevation drawings, that could be printed and used for reference while constructing the unit.
Excited about the design, I shared my concept with my dad, who is currently heavily "into woodworks" (which can be quite helpful to have him guiding me through my first adventures with DIY, as I am newbie :D), and we sat down and discussed how to handle this project. Without lying, everything seemed so easy and straightforward at the start..
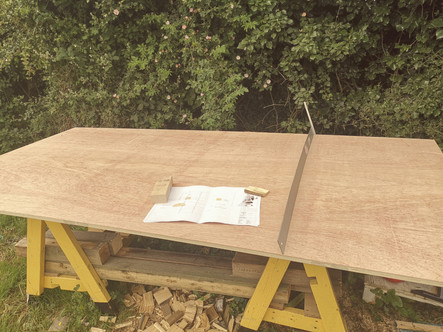
So, we got our main supply, 18mm thick plywood board, and began measuring sections for each letter (all letters vary in width). Dad wouldn't let me near the saw machine, so he had to cut the board into all necessary pieces. To ensure that we know where each piece is going, I numbered the sections on the drawings I made, and then I could number cut pieces accordingly.
Next task, was to ensure that letters such as S and D have the required angles. It was little bit tricky to cut the edges to the right angles, so they fit nicely, but we managed to achieve that with enough accuracy.
Health & safety tip - for anyone working with electric saw, make sure that you wear protective gear, i.e. googles, gloves etc. I would also recommend to have someone experienced to handle any cutting tasks, or to at least guide you how to safely operate saw machine.


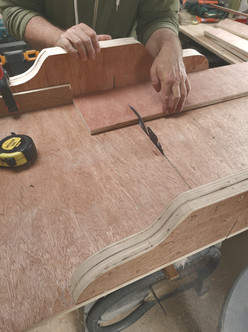

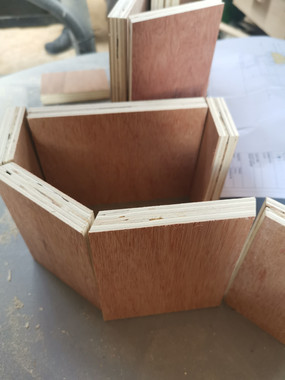
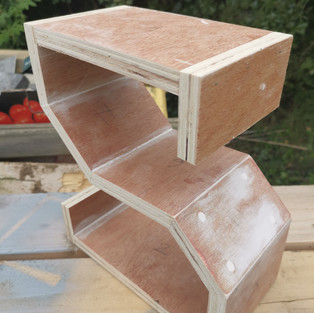
Satisfied with the angles, myself and dad proceeded to assemble the letters, piece by piece..
I have to admit, it did take a while to do, and at the end it was quite frustrating.. But eventually we managed to get all the letters made.
We used a mix of different assembly methods including wood glue and special clamps to keep the pieces together while the glue sets, nails and hammer as well as screws and drill.
Dad's after getting new handy and super light battery operated drill, and I absolutely loved working with it!! I am definitely asking for my own lightweight drill for Christmas!!! ;)


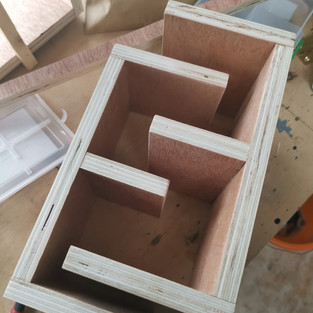
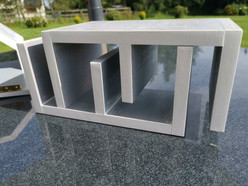
We let the glue set down over night. Next morning we began to prep each letter for painting. All sides had to be sanded down. I used my small manual electric sander for easy accessed areas, but any internal corner had to be sanded down manually. Once the surface was smooth enough, we filled the screw wholes and any gaps between the edges with a special filling paste, let it set and sanded down the paste. Next the letters were primed with grey spray paint.
Tip - while sanding down wood, I would advise to ensure that the room you are working in is well ventilated, or carry this task outside if possible. I would also suggest to wear a dust mask. Sanding down produces a large amount of wood dust, which is not necessarily healthy.
Similar precautions should be taken while using spray paint - well ventilated area. In addition, wear gloves.. otherwise you will be stuck with painted fingers for couple of days ;)


Back to the letters..
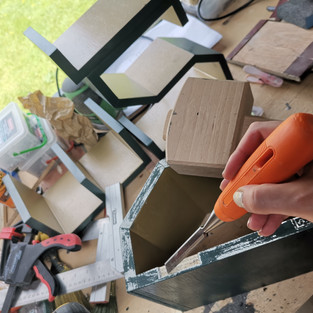
So now all the letters are freshly primed and left for drying. In the meantime, we decided to cut out little pull out door that will be later fixed to letter D.
This was one of the most difficult tasks, because the door had to be very accurate so it can be closed. Eventually, after few attempts and hours to trying to come up with best solution, we managed to solve this issue and assembled the door for initial review of the overall unit.
All letters were put in their right position, so we could step back and appraise our work.
It looked great! It finally started to resemble my initial design concept, which was really motivating to keep working on it to see the end result!


Satisfied with how the work is going, we decided to finish for the day..
Being honest I didn't expect it to take so long to get this shelving completed... And we were only half way there!! But it was all worth it in the end!
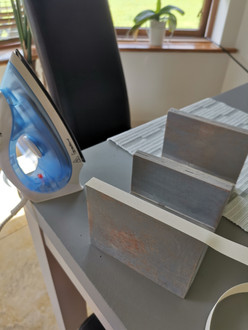
Following day, I had to take a trip to a hardware store and get some supplies - edging tape and cheap iron (Mum wouldn't let me use her good steam iron... :P). Armed up with endless tape, I began the "edging process", namely I've heated up the iron, and I have " ironed" the edging tape over the edges, so the plywood layers are no longer visible and we could achieve smooth edge surface...
Safety tip - be very careful while working with hot iron. It is very easy to burn yourself or anything around you! Maybe use some sort of gloves if you have a tendency to burn yourself? (I know there are special gloves used with curling irons for hair ;)).
If I was going to this task all over again, I would definitely start with cutting out tape strips of correct lengths and angles prior to ironing.. I haven't done that, as you probably have already guessed. This resulted in small, uneven gaps where the tape pieces meet, in particular at the angled sections..
However, as this was my first attempt of "edging" I am quite please with the end result. I mean.. It could have been a lot worse :)
And I didn't end up burning myself or anything around me.
That's always a plus!


Completing this tasks brings me to the very final step - color!
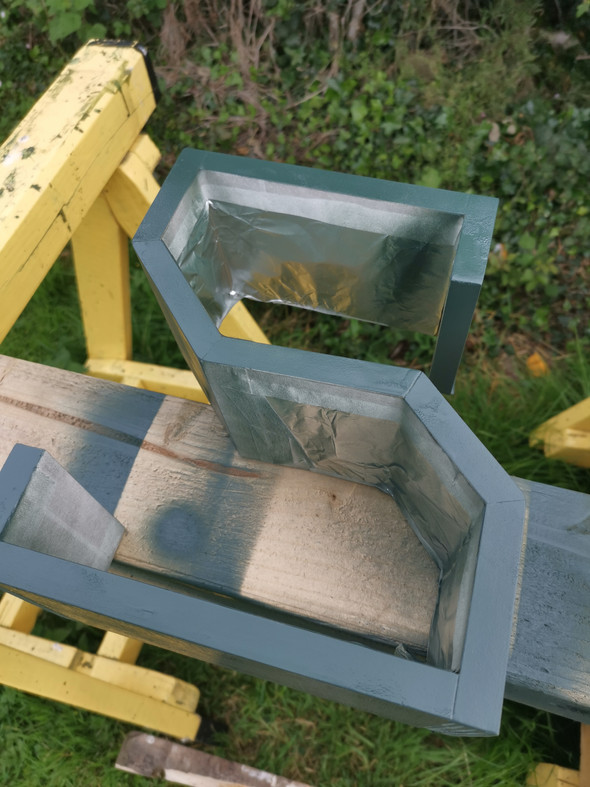
Colors that I picked for this unit are dark green for the external sections and gold for the internal sections.
I started with gold.
I used very good quality gold spray paint, that dries within an hour and is quite thick. Hence generally 2 coats are sufficient.
I have never worked with spray paint, and I have to admit it wasn't something as easy as I imagined. You have to be very patient with spray paint - ensure the paint is applied from the right distance, you don't spray too much paint in one spot, as it will create leaks.
You also need to remember that masking tape and probably some sort of kitchen foil are your best friends, if you decided to work with two colors in the way I have..
But let me take you through the whole process in detail..
So, as I mentioned I started with gold sections. I assumed that I don't need to mask the extent of gold section, as anything outside can be treated with green paint.
As you can imagine, I didn't struggle with this section and I sprayed the paint freely and left it to dry. After about 20 minutes I applied second coat.
Unfortunately I noticed few paint leaks.. But there was nothing I could have done about it at this point. The paint was pretty much dry and I didn't have any left to sand it down and spray it again.
I guess that is another tip.. get some extra spray paint, because if you are a beginner as me, you will definitely make mistakes and will need it :P
Now, the hard part started - covering the gold sections with masking tape and some kitchen foil to avoid covering the entire gold area in masking tape... Once the gold sections were protected I covered the remaining areas with two coats of dark green paint.
Here again, unavoidable paint leaks in some areas appeared. What's worse, is that while I was pulling off the masking tape, it came of with bits of paint that was covering the edging.
Luckily, I had the last drops of paint leftover so I could have corrected the mistake.


Once the letters were stripped of the masking protection, I could admire the nearly finished product. At the start I wasn't entirely satisfied with my spray painting skills, but once the unit was put together and I took a step back, I realized that I actually did a very good job, considering it was my first time using spray paint and I didn't even watch YouTube videos - How to use spray paint. ;)
The green and gold works so well together, I think you would agree with that??
Anyway, it was time to start fixing everything together.
To ensure the unit is stable and rigid enough, we decided to add additional piece that will run along the back, connecting all letters.. Something like a "spine".

Everything seemed to fit, until we made the attempt to fix the little door at letter D.. after adding edging the door wouldn't fit in.
Not going to lie.. It nearly drove me mad! Such a silly mistake!
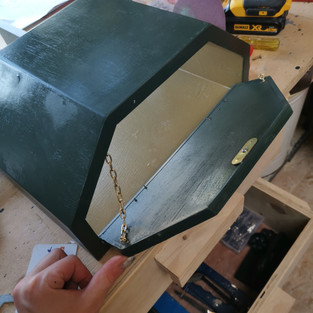
But after 10 breaths in and 10 breaths out we figured out how to fix it. It required carving out the edging, where the hinges where initially located. It took a while of hammering, but eventually I got the right depth, sand it down and sprayed it with green paint and it was ready to go! Even hinges fitted in nicely.. That's handy :D
Last piece of puzzle - fixing a gold chain to hold the door from opening too far and something to keep the door closed, like a little cute gold latch, that I found in the hardware store.


Now, once all pieces are put together it's the time to secure them to the spine.
Again, screws, drills, nails, hammer, clamps were constantly being used to secure each letter back to the spine and to each other.
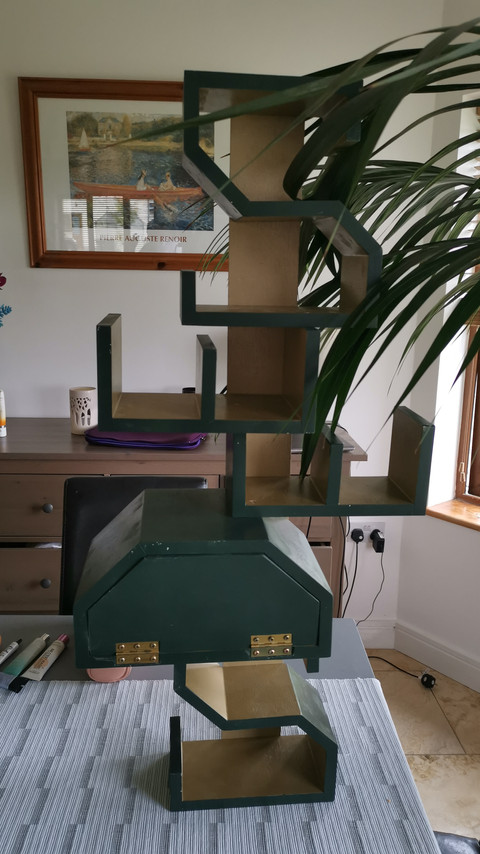
Finally, the shelving unit was complete!
Absolutely pleased with the finished product, I gave myself and dad pat on the shoulder for doing such a good job!
I mean.. Considering this is our first furniture item, which was designed and built completely from a scratch, I think it came out great!
In addition, it was a great journey in learning what not to do :)
Anyways, I am going to let you see the finished unit and decide for yourself if you agree with me :) Apologies for bad photos.. I only realized that I don't have decent finished photos after I gave it away as a preset...


Hope you enjoyed this post and let me know if you have any questions, or perhaps are looking for a bespoke shelving unit ;)
Chat soon!
DOM